Friday, 27 September 2013

Seedy cheesy crackers - Bread Baking Babes September 2013

This month Bread Baking Babe Tanna from My Kitchen In Half Cups chose us a recipe to bake crunchy crackers. I never managed to get crackers crunchy, so was very happy to have a go. The original recipe asked for a mix of white whole wheat and unbleached all purpose flour, but any mixture of flours of your choice would do.
I immediately thought "CHEESE" when reading the recipe. Crunchy seedy crackers NEED cheese. I decided to top the first batch of the crackers with grated gruyère. Big success! The smell, the taste, fantastic! No extra topping needed.

The second batch unfortunately ended up in the bin.
The dough had sat in the fridge for a couple of hours, being very cold rolled out beautifully, but being in a hurry I grabbed flaked sea salt in stead of cheese (what was I thinking) for the topping. I overdid it big time. Way too salty, inedible (but soooo crunchy and good looking).

I'll definitely bake these crackers again. With different mixtures of flours and different toppings, but the seedy cheesy crunchy variety will be baked and eaten over and over again here!


Recipe adapted from King Arthur Flour:

Binned ....
DOUGH
1 tsp instant yeast
170 gr Whole Wheat Flour
60 gr Strong White Bread Flour
60 gr AP flour
1 tbs sugar
1 tsp salt
14 gr ground flax seed
14 gr sesame seed
10 gr olive oil
188 gr water

TOPPING
mixed seeds (sunflower, pumpkin, sesame, poppy, flax, etc.)
grated gruyère cheese

METHOD
Put all dough ingredients in the pan of a bread maker and choose "Dough" program (mine takes 2.20 hours, including first rise).
Take the dough out and divide in half. Working with one piece at the time, roll it into a rectangle as thinly as you can. The thinner the dough the crunchier the crackers! If the dough fights back; give it 10 mins. rest and roll again. Put the other half of the dough in the fridge (in a plastic bag) to use later. I found rolling the cold dough was even easier!

Turn the dough onto a piece of baking paper and spritz with water. Sprinkle with a quarter of your seed mixture. Lay a piece of baking paper on top and press the seeds in with a rolling pin. Turn the dough over, peel off baking paper and repeat, but also add gruyere cheese. Again top the dough with baking paper and press in seeds and cheese with a rolling pin. Peel off the top layer of baking paper.

Transfer the dough -with baking paper underneath- onto a baking sheet, prick it all over with a fork and cut the crackers into your desired shape and size (with a pizza cutter or normal knife. If you want to see a proper cracker cutting gadget check out Tanna's!) . 
No need to separate the crackers, they easily brake apart after baking. Let the crackers rise (covered/in a plastic bag) for 30 - 45 minutes, while you preheat your oven (170ºC fan). They'll get just a bit puffy.

Bake for 20 minutes until the crackers are a medium brown. Turn off the heat, wait 15 minutes then put the oven door ajar and let the crackers cool completely. When they're completely cool, break apart and .... ENJOY! 


Sunday, 15 September 2013

Sûkerbôle - Back to the Future Buddies


Carola from Sweet and Thats It chose this recipe for "Fryske sûkerbôle" or in Dutch "Fries suikerbrood" as the very first bake of a new baking project she initiated: Back to the Future, Buddies.

For all us Buddies who have joined in later, or have missed one or more (or a lot of) baking projects by the Bread Baking Babes and of course for any keen baker who likes to bake together. If you'ld like to bake along, have a look here.

Being Dutch, but living in Scotland, I was very excited to find we are baking a Dutch recipe this time. Originally it was posted by Bread Baking Babe Monique of Living on bread and water back in September 2008.

Since sûkerbôle is something typical Dutch, it is not available here for me to buy, so I had tried baking it before. With mixed results. Well, this recipe definitely worked out better! 
Luckily Carola gave us a hint a few days back how to make your own ginger syrup (recipe) but you can also use the syrup from a jar of stem ginger.

This really tastes like sûkerbôle as we know it from back home! I think the secret's in the 
homemade ginger syrup ....


My version of the recipe for two small loaves (for original 2008 recipe visit Living on bread and water or Carola's 2013 version at Sweet and Thats It)

For the dough:
7 gr instant active yeast
250 gr all purpose flour
250 gr strong white bread flour
10 gr salt
2 large beaten eggs (130 gr)
45 gr of ginger syrup
155 gr warm milk
75 gr melted unsalted butter, cooled

Put all ingredients in this order in the pan of your bread maker and choose the "dough" program. (I know, some of you might feel this is cheating, but hey, I don't have a mixer, so it is a pretty good alternative.) When the program is done, take the dough out and divide in two. Leave to rest for 10 mins. (covered). Flatten the dough into two 1 cm. high rectangulars, the short side the length of your bread tin. I used single use tin foil ones, very practical.

For the filling:
1,5 tsp ground cinnamon
150 gr broken sugar cubes

Divide the filling over your dough and roll up (tightly!) from the short side. Place the dough in the well buttered bread tins.

Topping:
milk for brushing
broken sugar cubes to sprinkle

Brush the dough with a little milk and sprinkle with some more broken sugar cubes.
Cover and let rise for about 40 mins.
When well risen, bake in a preheated oven at 180C (fan) with steam. After 10 mins. cover the loaves loosely with tin foil. After 20 mins. turn back the oven to 160C. Bake for another 10 to 15 mins.
Remove the loafs from the tins and place on a wire rack to cool.

Enjoy on its own, or -preferably- with butter!


Monday, 26 August 2013

"52" Cinnamon Nut Roll Coffee Cake/Bread

The August challenge set by Bread Baking Babe Jamie of Life's a Feast is "Cinnamon Nut Roll Coffee Cake". After reading Jamie's story about her ordeal of baking and posting about this Coffee Cake I just had to give it a go!

The recipe describes a two day procedure, so (way too) late at night I prepare the brioche-like dough, shove it in the fridge and hope for the best. It feels like an awful lot of yeast and butter in there ....

The next morning -very excited- I cannot wait to take the dough out of the fridge and see what happened overnight. If anything. Nothing. The same sized blob as the other night, but now rock hard and cold. Back to the Babes and Buddy's to see if anyone had the same problem ...
I decide not to give up yet and give the dough some good old room temperature time. After about four hours (!) there seems to be some life in my bowl. Another two hours later it looks plump and has grown a lot, so I prepare the walnut merengue filling, to be rolled into the dough. Since I don't have a "tube pan" a loaf tin has to do. I know; I could have been more creative.

Not making it too easy on myself I divide the dough into THREE parts, pressing them out into rectangulars. Then spread them with the filling and roll them into sausages. These three sausages are carefully lifted into the bread tin, all seam sides to the middle. No idea what this will lead to. Since time seems to do the trick for my dough today, I give it another two hours at room temperature. Wow, that yeast is still alive and kicking! 

After brushing with milk and sprinkling slivered almonds on top, the cake goes into the oven, 165°C (fan) for an hour, the last 20 minutes covered with foil.


What a fantastic surprise! 

The cake/bread turns out to be extremely soft, sweet and satisfying, even without coffee, very late at night. 


Looking forward to breakfast already!


"52" Bread/Cake

JAMIE's RECIPE

CINNAMON NUT ROLL COFFEE CAKE
Adapted from Taste of Home Bakeshop Favorites.

* Note that the dough rests in the refrigerator over night, so start the process the day before! If you are using European regular flour, start the basic dough with 3 cups (390 g) flour; if using American all-purpose flour, begin with 2 ½ cups (325 g) then add more as needed the second day when kneading the dough before rolling. I have given the original filling recipe as well as my own adjustments and changes below it.

You will need a stand mixer or beaters to whip egg whites for the meringue filling and a 10-inch (standard) tube pan, preferably with a removable center (I used a large loaf tin, see above).

For the dough:
14 gr active dry yeast/instant dry yeast
65 ml lukewarm water 
225 gr unsalted butter, melted
125 ml lukewarm 2% fat/lowfat milk
4 egg yolks
2 tbs sugar
¾-1 tsp salt
325 gr* all-purpose flour (if using European regular flour, increase total flour to 390 g, more if the dough is too sticky or runny.
Meringues from leftover filling
 * I used 200 gr all purpose flour and 190 gr strong white bread flour.

For the filling (way too much, but the leftover filling makes nice meringues!)
100 gr (=3) egg whites
135 gr light brown soft sugar + 2 tbs (30 g) light brown soft sugar
125 gr ground hazelnuts or almonds or walnuts
1 – 2 tsps ground cinnamon
2 tbs 2% fat/lowfat milk

A bit of milk for brushing the top and the seams of the cake and slivered blanched almonds for dusting, optional but pretty.

The day before, prepare the dough:
In a large mixing bowl, dissolve the yeast in warm water; allow to activate for 10 – 15 minutes until foamy. Whisk in the tepid melted butter, warm milk, eggs yolks, sugar and salt and then stir in the flour. Beat or stir until smooth – the mixture will be sticky. Cover and refrigerate overnight.

The day of baking, prepare the filling:
In a small bowl, beat the egg whites on medium speed until soft peaks form. Gradually beat in 135 gr sugar, about 2 tablespoons at a time, on high speed until the sugar is incorporated and dissolved, leaving a thick, glossy meringue.
In a large bowl, combine the ground nuts, cinnamon and remaining sugar then stir in the milk until the dry ingredients are all moistened; fold in the meringue.

Prepare the Coffee Cake (Because I used a completely different tin, I had to improvise as described above; original method down here):
Grease/butter the bottom, sides and center tube of a 10-inch tube pan.
Divide the dough in half. On a well-floured work surface, roll each portion into an 45 x 30 cm rectangle with the longer side perpendicular to your body (the longer edge lying on the cutting board left to right). Spread half of the filling evenly over each rectangle within 1 cm of the edges. Lightly brush the farthest, top edge with milk. Roll each up jellyroll style, as tightly as possible, starting with the long side closest to you and rolling up; pinch seam to seal.
Place one filled roll, seam side up, in the greased tube pan. Pinch the two open ends together. Place the second roll, seam side down on top of the first roll, again pinching and sealing the two open ends. Gently brush the top all over with a bit of milk and dust with some slivered almonds.
Cover the pan with plastic and allow to rise for 1 hour.
Preheat the oven to 180°C.
Once the coffee cake has risen, discard the plastic wrap and once again gently brush or dab the top surface all over with a bit of milk and add more slivered almonds where there are spaces.
Bake in the preheated oven for about 45 minutes or until puffed and golden brown. Remove from the oven and allow to cool for 10 minutes. After 10 minutes, loosen the coffee cake from the sides of the pan and lift out the center tube, placing the tube with the cake onto the rack to cool completely. Once cool enough to handle, loosen the cake from the bottom of the pan and around the tube using a long, thin blade and carefully invert, lift off the tube and flip back, top side up, onto a serving platter. Or lift off of the tube onto the serving platter.

Thursday, 1 August 2013

July BBB challenge: Rheinbrot or Wine Bread


This month Bread Baking Babe Astrid from Paulchen's Food Blog set us BB Buddies the challenge of baking a sourdough bread with wine.
Two things I love, so right up my alley!
The recipe asked for Riesling wine, but unfortunately our supermarket didn't stock any. I decided any white wine would have to do. The procedure was very interesting; wine, water, flour and sourdough starter (I used my rye starter) were mixed into a poolish (or sponge) and left for 4 hours in a warm place (I used my oven with the light on). After that another overnight resting period on the kitchen worktop at room temperature. I ended up with a bubbly, lovely fresh smelling elastic mass in the morning.


Poolish after 4 hours
Poolish after 16 hours


After mixing, resting, kneading (I kneaded by hand for about 20 minutes) and yet more resting and folding, I ended up with a beautifully soft and well developed, but fairly sticky dough, which I managed to get into the proofing basket without ruining it too much. My wood fibre proofing basket worked wonders again: never ever have I found any dough sticking to it!
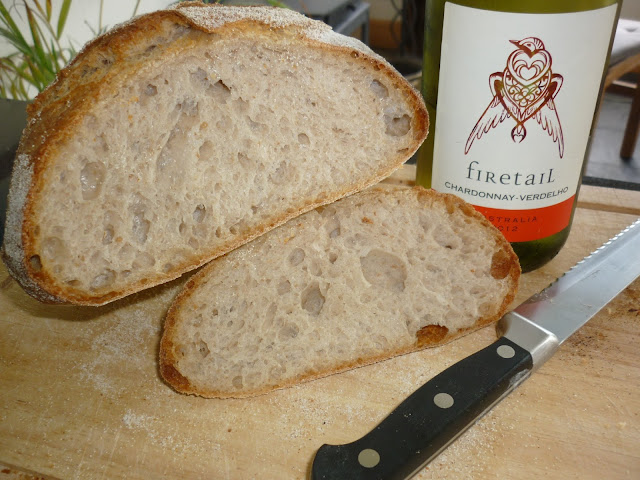
Following the recipe I ended up with a very airy, fantastic looking and tasting bread with a slightly sour taste, just enough to remind you of ... wine.


Recipe Rheinbrot (My own comments are printed in orange)
The following recipe has been translated form this forum, where the chemics of wine and bread baking are being discussed in this post: Хлеб и вино. Rheinbrot, Рейнский хлеб с Рислингом (Google translate will help a bit)

Sponge:
50 gram semisweet Riesling (or any white wine)
50 gram boiled water, at room temperature
100 gram flour (I used organic strong white bread flour)
50 gram of wheat sourdough at 100% hydration (I used rye sourdough at 100%)
Dough
250 gram flour (again I used organic strong white bread flour)
135 gram water
6 gram salt

1) Mix wine with water and add the sourdough, whisk thoroughly.
2) Add flour  and mix again.
3) The dough ferments at 2 stages:
3a) 4 hours at a temperature 30-32°C, it should grow at least twice its size, will be lumpy looking at this stage and have larger and smaller bubbles. If you stick your nose into the container, the scent will be somewhat unpleasant, it may even seem that the dough has deteriorated. Don't panic, this only means the dough is doing the right things. (The poolish didn't exactly grow twice its size, but was very lively. I never experienced a foul smell.)
3b) Pour the sponge in a bowl and whisk thoroughly to remove all the gas out of it and fill it with oxygen. Cover with foil and let sit for 10-12 hours (overnight) at room temperature. Dough will rise again in half and very often shows smaller bubbles.
4) Now the sponge is ready for kneading: pour in the water and stir until smooth. Add the flour, mix well and give the autolysis a chance to do it's magic for 40-50 minutes.
5) Add the salt and quickly knead the dough (I gave it a good 20 minutes of hand kneading), if it is too sticky add a little four, but be careful not to add too much. (The dough stayed pretty wet and sticky.)
6) Let ferment for 2-2.5 hours. Fold twice after 1 hour and 1 1/2 hour. The dough smells fresh now, no smell of the wine.
7) Form a loaf and let proof in a basket for 1 1/2 hours (doubles in size) covered with a towel in a draft free place.
8) Preheat oven with baking stone to 240°C.
9) Transfer dough to your baking sheet. Make an incision or two and let it slide on your baking stone.
10) Bake for 10 minutes with steam and without steam like 20 minutes at 200°C. (I baked at 240°C for 10 minutes with steam and another 30 minutes at 220°C without steam.)
11) Let cool down for at least half an hour before slicing the bread.

You should have a bread with a nice soft crust and an airy crumb. Enjoy with some nice glass of white wine to accompany the bread ;o)


Sunday, 30 June 2013

Nan e Barbari - Persian flatbread


Elizabeth from blog from OUR kitchen set the BBB (Bread Baking Babes) challenge for this month and promised us BBBuddies some hand-kneading fun.

We are making a Persian flatbread, topped with a sauce and seeds. All by hand. Which suits me absolutely fine.


It started with a very wet dough made from parts plain flour and a little whole wheat, some yeast and baking powder, salt and water. After a lot of slapping, folding, scraping off hands and more folding the dough was still very wet. I performed some stretch and folds during the first rise, hoping the dough would strengthen, which it did, a little. I wasn't too worried, because we were making a FLAT bread after all.


The sauce to top the bread is called Romal: a boiled mixture of water, flour and baking soda. Mine boiled over big time, so keep an eye on your saucepan. It did give me an idea of the smell it would bring to the bread: my cooker was covered in burnt Romal which didn't smell too badly!


After the first rise the dough is divided into two balls and left to rise again. I made the mistake of brushing the Romal on at this stage, a bit too early. After the second rise -with or without Romal- the two balls are shaped into ridged flatbreads, covered with Romal once more and topped with seeds of your choice.


After another rise (I had to skip the stretching of the loafs because they were glued to the baking paper ) I baked my flatbreads on a very hot stone in a preheated oven (preheated on the highest temperature which is 220C in my fan oven) for about 18 minutes. I put the temperature down to 180C as soon as the breads were loaded onto the stone.


Please find the exact recipe here on Elizabeth's blog.
We enjoyed the nan e barbari with goats cheese, olive tapenade and roasted peppers as a wonderful pre dinner snack.

Monday, 20 May 2013

Whip, whip, whip, whip, whip ..... whipping buddy style

Since the moment I read about this months Bread Baking Babes and Buddies challenge I've got this tune in my head and it won't go away. I will not name it, because that would make it worse.
The challenge is set by Ilva at www.luculliandelights.com and we are making whipped bread,
a recipe by Danish Hanne Risgaard, from "Home baked: Nordic Recipes and Techniques for Organic Bread and Pastry".

By reading "whipped" I thought I'ld have to pass buddy baking this month because I (still) don't have a stand mixer. But of course out came the good old electric hand mixer again!
For a second I considered trying the whisks (whipping/whisking), but then decided on the dough hooks. The dough came together in no time! That was easier than expected!
Part one done: the covered dough spent a long night in the fridge for about twelve hours. The next day, after sitting on the worktop for another couple of hours to warm up a bit, the dough was divided into two parts and gently twisted.


So far so good. After another hour of covered rising the most difficult part: sliding the risen dough onto the hot baking stone in the oven. I definitely lost it there shape wise....

And see the end result: "The flat hippo"


Slightly disappointed and blaming my 'not-long-and-hard-enough-whipping' for the loss of nicely twisted shape, I was weary to slice the loaf. But what a pleasant surprise: look at those holes! 


The bread has got a beautiful thin crisp crust, a nice chewy open crumb and bags of flavour.
It tastes a lot better than it looks!

Thanks Ilva for this fun and tasty bread!

RECIPE WHIPPED BREAD (makes 1 loaf) - Inspired by Hanne Risgaard
420 gr white (sifted) spelt flour
80 gr whole wheat flour
2 gr instant yeast
10 gr salt
400 gr water

Combine all ingredients in a mixing bowl and mix the dough at high speed using a whisk until the dough no longer sticks to the sides and bottom of the bowl. Let the covered dough rest in the fridge overnight. The next day allow the dough to warm for a couple of hours before continuing.
Gently turn the dough onto a generously floured work surface and dust the top of the dough with a little flour. Divide the dough into two equal-sized pieces. Quickly twist the pieces together, preserving as much air in the dough as possible.
Place the twisted loaf on a peel lined with baking paper and let proof (covered) until nearly doubled in volume. Meanwhile preheat the convection oven with baking stone to 250°C. 
Generously mist the inside of the oven with water. Ease the loaves, along with the parchment paper, onto the baking stone. Spray a little more water into the oven. Repeat after one minute. 
After 5 minutes of baking, lower the heat to 210°C, then bake the loaf for another 20-30 minutes more.


Sunday, 31 March 2013

Gateau à la crème and brioche bread

It's still March, just, so here is my result of the March baking mission given to us by Bread Baking Babe Lien (Notitie van Lien). Lien chose a sweet recipe based on Raymond Blanc's "Gateau a la Creme". Since Raymond Blanc is one of my favorite TV chefs too -well behind Michel Roux Jr though!- I was even more tempted to try this recipe.
I had never made brioche, thinking it would be far too complicated and not for the ones-without-KitchenAid or Kenwood-on-the-counter. But hey, out came the good old hand mixer with dough hooks and the result was overwhelming!


The recipe was fairly easy to follow too! The amount of butter and eggs seem a bit scary at first, but since my friend keeps free range hens, good eggs are always available in abundance.


I choose to make one gateau and one small brioche bread as suggested by Lien. I did make the gateau in a spring form to keep it in shape. And yes it rose! The sides almost folded over the lemon custardy filling. For decoration I used some bashed up sugar cubes, because no nibbed sugar available around here.
Tadaaaaaa


And it tasted even better than it looked! 
This recipe is a keeper! You'll find it at Lien's blog.

The leftover egg whites were easily turned into almond merengues, what more could you wish for?


Well, one more thing .... THE badge!!!


Wednesday, 27 March 2013

Dutch baking

As a birthday gift I got a fabulous Dutch baking book by Gaitri Pagrach-Chandra: "Het Nederlands Bakboek", only available in Dutch at the moment I believe, but loosely based on her previous "Windmills in My Oven".


"Het Nederlands Bakboek" is filled with culinary history on Dutch baking and loads of traditional recipes, making this Dutch-lady-living-abroad feeling very proud of our Dutch baking tradition.
Since moving away from Holland I have been trying to replicate the various breads we used to love and also some typical sweet baking that is so different from what bakeries (let alone supermarkets) here in Scotland produce.

Not so much because we miss things -there are wonderful alternatives out here-, but just for sentimental reasons, you know .....

It's obvious, I cherish this Dutch baking book, love the look and feel of it, and of course started baking! My first attempts were on various cookies; "krakelingen" (yeasted sweet, crisp, pretzel shape cookies) and "eierkoeken" (large soft, eggy, sweet, slightly lemony cookies).

Both were a huge success!

So, to be continued ...